

My mom has loved buttercrunch candy for as long as I can remember. I used to think it was such a treat to get! I can remember begging to get candy at Hebert’s in Sturbridge whenever we went up there for anything. And Buttercrunch is so creamy and crunchy and good, I can’t blame her for loving it.
A while ago at the Big E (Eastern States Exposition), my mom tried some from a place in Vermont. She said it was the best she had ever had. However, it’s not cheap! It’s going to set you back about $70 for a 2 lb box, plus shipping, which also isn’t cheap. I’m not saying their pricing isn’t fair, because just to be clear – the ingredients aren’t cheap and from a time standpoint, it’s a labor of love. But I couldn’t rationalize spending $100 on candy and shipping when it wasn’t going to be her only gift. When I was a child I enjoyed candy making, so I figured, why not? I’ll just try making it. See what happens. I have to say, I was thrilled with the results!
Surprisingly, I had difficulty finding a recipe that seemed right. There were a lot of them out there, but they were missing key ingredients or they were using hacks involving melting down butterscotch candies and things like that. There’s nothing wrong with those recipes; but they weren’t going to fool a buttercrunch connoisseur like my mom!
I don’t think it’s quite the same as the one I was trying to replicate, but it definitely beats the pants off of several of the local great candy shops I can think of! It’s buttery and toasty and delicious, and I advise breaking plenty of pieces so that you can justify eating them throughout the process 🙂


Enjoy!
Ingredients:
- 1 Cup Salted Sweet Cream Butter
- 1 1/4 Cups Granulated Sugar
- 2 Tbsp. Light Corn Syrup
- 3 Tbsp. Water
- 1 1/2 Cups Slivered Almonds, Chopped
- 1 1/2 Cup Raw Cashews, Chopped
- 12 Ounces Milk Chocolate Chips
Technique:
- Line a cookie sheet or baking pan (13″ x 9″) with foil and rub a bit of butter or coconut oil onto the foil. There shouldn’t be much grease, but it will help you peel off the foil at the end.
- In a saucepan, melt the butter over low heat. Once it has melted, add the water, corn syrup and sugar. Stir with a wooden spoon until the sugar dissolves.
- Raise the heat to medium and continue stirring vigorously. Keep the mixture moving so that no single area has the chance to burn and you can evenly cook the whole thing. Once the mixture starts to thicken and takes on a pale golden color (it should look almost almond colored, actually), stir in 2 Cups of the nuts (save the rest for your garnish!). Keep stirring the mixture until it reaches 310F (also known as hard-crack stage; this can be tested by dropping a bit of the hot mix into a glass of cold water. If the strands are brittle and sharp when in the liquid, you’re there). It should be a dark golden color, and there shouldn’t be any chalkiness to it. All of the sugar should have dissolved and carmelized, and it should be fighting the spoon when you try to stir and bubbling a bit. Here’s the color you’re looking for:
-
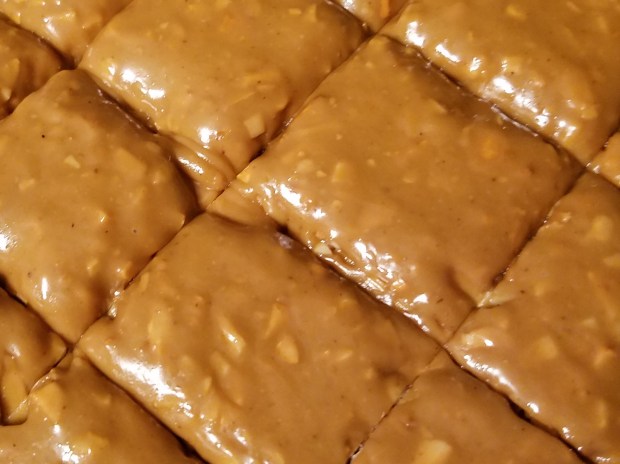
This is the color you’re looking for!
- Quickly pour your mixture into the prepared pan. Spread it as fast as you’re able to with your wooden spoon or spatula. It will be HOT so be careful not to touch it directly. Get it to about 1/4″ – 1/2″ thick. Now, take a big knife (I like a butcher knife or something equally large for this) and gently press down to make indents. You don’t need to cut it all the way through, but if you don’t make nice, even squares out of it now, it’s going to be impossible to do it later. So press down about two thirds of the way, making 1″ or 2″ squares depending on your preference. Let cool completely.

- Once the toffee has cooled, create a double boiler to melt your chocolate. To do this, put a heat safe bowl over a simmering pot of water, ensuring that the bottom of the bowl doesn’t touch the liquid. This melts your chocolate gently and keeps it from burning. Don’t microwave it – since you’re not adding anything to the chocolate, the risk of ruining it is too high. Throw some chocolate in the bowl and stir until it’s melted.
- Peel your toffee off the foil and flip it over so that the perforated lines face down. Apply gentle pressure to break it into squares along your cuts. Once they’re all broken, start tossing them into the chocolate one at a time. Use a fork to cover a square fully in the melted chocolate, tap off the excess on the edge of the bowl so you don’t waste it, and drop into the remaining nuts. Flip it around so it’s completely coated. Transfer to a piece of foil, wax paper, or parchment and throw them into the fridge to harden.
Tips:
This candy will stay fresh for about two weeks if you’re keeping it in the refrigerator in an air tight container.
