

These scones have quickly surpassed cake as my favorite thing EVER. They’re crumbly and delicate and perfect, not too sweet but can definitely pass for a dessert if you want them to! The fresh berries add loads of flavor and keep them moist, and the honey cream glaze makes them into a decadent treat.
I have always loved the idea of scones, but not so much actual scones. These, however, have changed my mind. They’re what I always imagined a scone to be when I would see a particularly nice looking one, sitting on an antique plate next to a pot of tea or cup of coffee at some amazingly fancy place. These taste how those looked.
Best part is, they’re quick to whip up and quick to bake!
Ingredients:
- 2 Cups Flour (I use Bob’s Red Mill Gluten Free Baking 1 for 1 Flour)
- 2 1/2 tsp. Baking Powder
- 1 Tbsp. Brown Sugar
- 5 Tbsp. Salted Butter
- 1 Egg
- 1/2 tsp. Pure Almond Extract
- 3/4 Cup Whole Milk
- 1 Cup Blackberries (rinsed and patted dry)
- About a tablespoon or two of extra milk for brushing
- Glaze:
- 6 Tbsp. Confectioners Sugar
- 1 Tbsp. Honey
- 1 Tsp. Milk
Recipe:
- Preheat your oven to 450 F. Lightly grease a baking sheet with a very small amount of butter.
- Mix all dry ingredients together in a large bowl.
- Cut butter into chunks, and blend into dry ingredients using either a pastry cutter, two knives drawn back and forth in opposite directions, or a fork to mash up the butter. Keep going until your mixture has fine crumbs and the butter has been completely incorporated – now is your one shot to make sure there aren’t any lumps. Once you add the wet ingredients, you’ll need to be much more careful about over-mixing.
- Drop your dried off berries into the flour and mix them around with a fork or clean hands to ensure the berries are coated. This will help prevent them from sinking during the bake.
- Beat the egg and milk together slightly in a small bowl. Add to the other ingredients and mix lightly with a fork until just combined (aka no large, visible patches of flour). I know it’s tempting, but don’t over-mix or you’ll end up with tougher, drier scones. The dough will be slightly sticky.
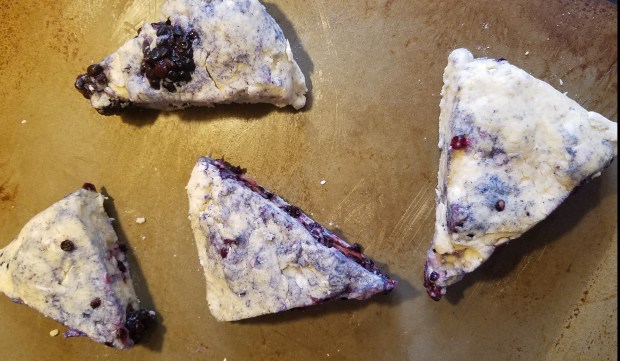
- Put out a sheet of wax paper and dust it with flour. Bonus – if you use your hands to do this, your hands will already be floured to work the dough! Turn out your dough onto the wax paper, compressing it slightly while shaping it into a square that is about an inch high. Cut the square all the way across the top from both sides (like a plus sign +), to create 4 smaller squares. Separate each square and cut them in half again to make pie-wedge shapes.
- Dip your fingers (or a pastry brush if you’re fancy!) into the extra milk and brush it over the tops of the scones. You can sprinkle them with coarse sugar if you’d like at this time, and then you can skip the glaze. Or you can get crazy and do both, your call. Bake for 17 minutes. Remove and let cool completely on a wire rack.
- While your scones cool, mix together the glaze ingredients. Continue working it together until it’s smooth and there are no visible lumps. It should be a light golden color.
- Drizzle glaze over the scones with a spoon, using long back and forth motions to make a zig-zag pattern.
Tips:
- These will keep for about 3 days with no loss of quality. Store them in the fridge if you have any left over after the day you bake them (I never do!), because the berries could potentially get moldy if you don’t.
- If you put a sheet of wax paper, foil, or paper towels under your cooling rack, you can drizzle the glaze right over it for quick clean up.
- You can switch out the extract for any you like, same for the berries! You can also use frozen ones in a pinch, just try to brush any frost off before adding them to the flour.


Enjoy!
